
Turn your canvas paintings into collage art
If you're looking to breathe new life into your paintings, you're in for a treat. In this tutorial, I'll walk you through one of my absolute favorite ways to get creative. All you need is a painting you were about to paint over or toss, plus a few art materials (check out the list at the end of this post).
As an artist, I'm all about recycling – I turn extra paint into earrings, I use canvas as palettes and frame them, and I give unwanted canvas paintings a fresh start with these awesome collages! Join me, and let's have a blast cutting up our art. Fair warning, it's so much fun that you might be tempted to transform all your paintings!

My first set of collages in 2022 was an exploration of joy and creativity at it’s best!
Turning discarded paintings into collage art is a unique and exciting process. Sometimes, a painting may lack direction or struggle to find a buyer, but it still holds beautiful brushstrokes that can take on a new life through collages. The best part? You can create 8-10 small collage works from just one underappreciated painting, bringing not only new art to life but also injecting a wonderful sense of play into your creative process.
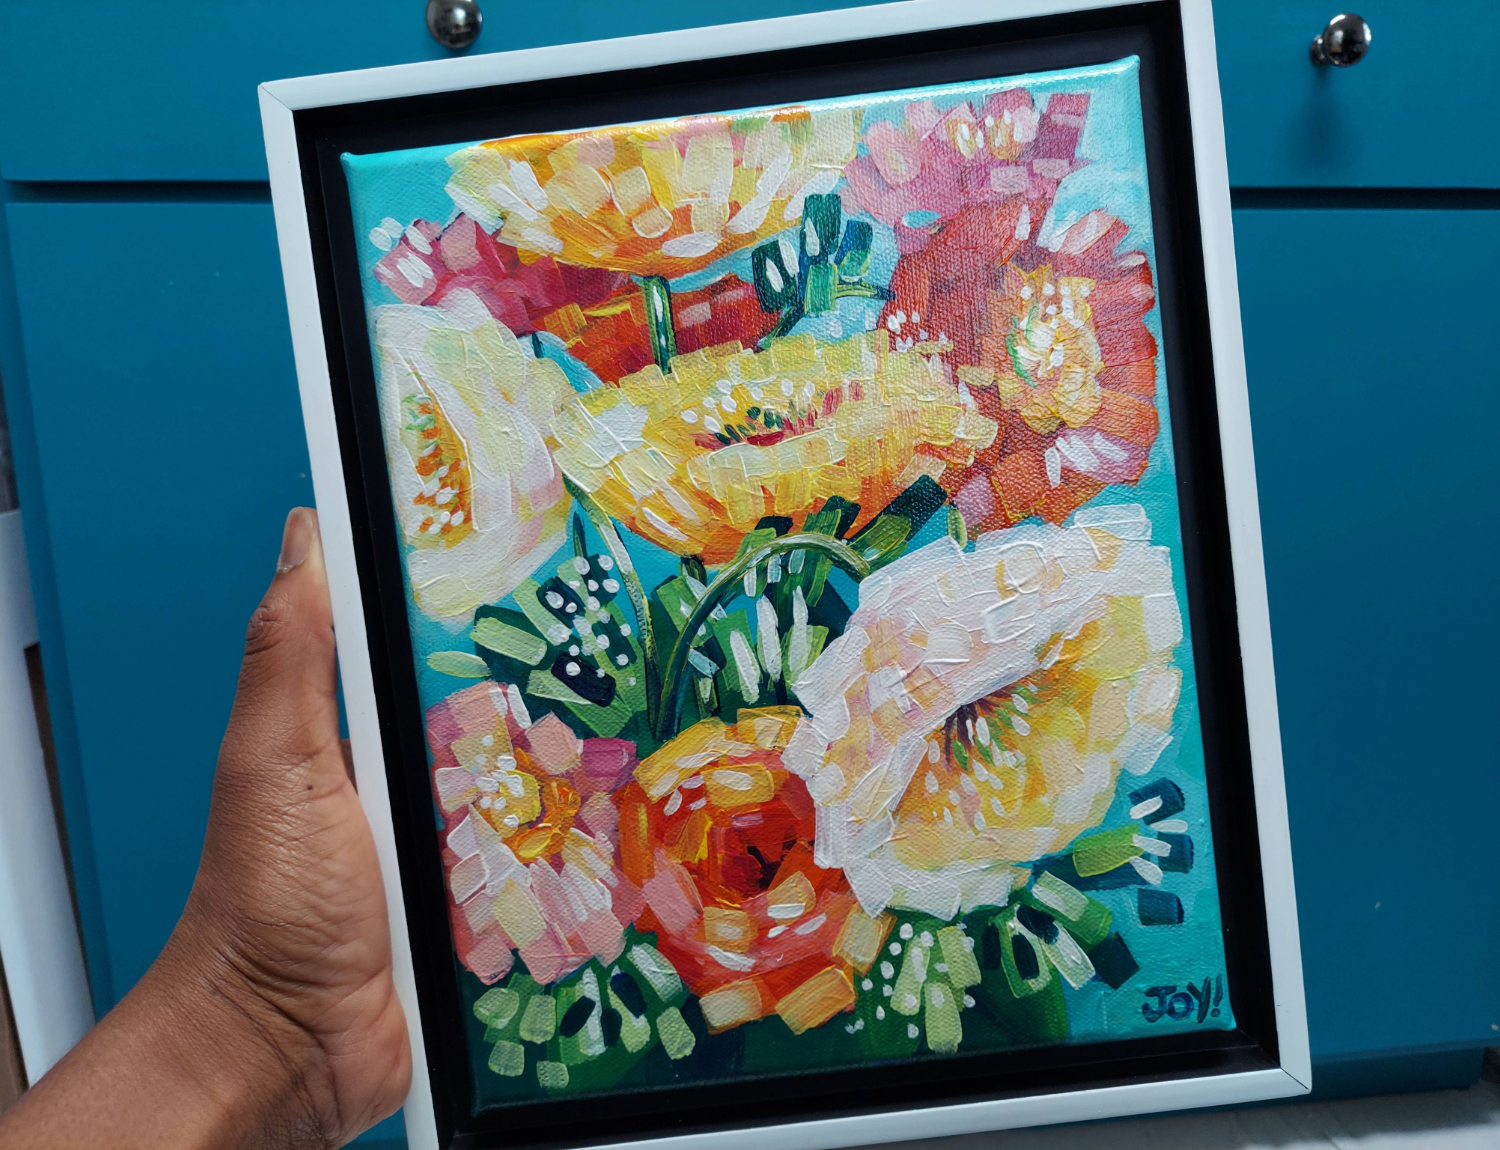
This painting was made in 2022 and the composition of the flowers were very off. It was a perfect painting for this project! Time to cut it up!

Step 1: Remove the Canvas from Stretcher Bars
If your painting is framed, start by gently unframing it. Flip the canvas over and remove the staples from the back using a flat-head screwdriver and needle-nose pliers. Store the bare stretcher bars until you're ready to use them. It's like preparing a canvas for a new adventure!


I store bare stretcher bars on a peg board behind the door of my art studio.
Step 2: Get Your Scissors and Start Cutting!
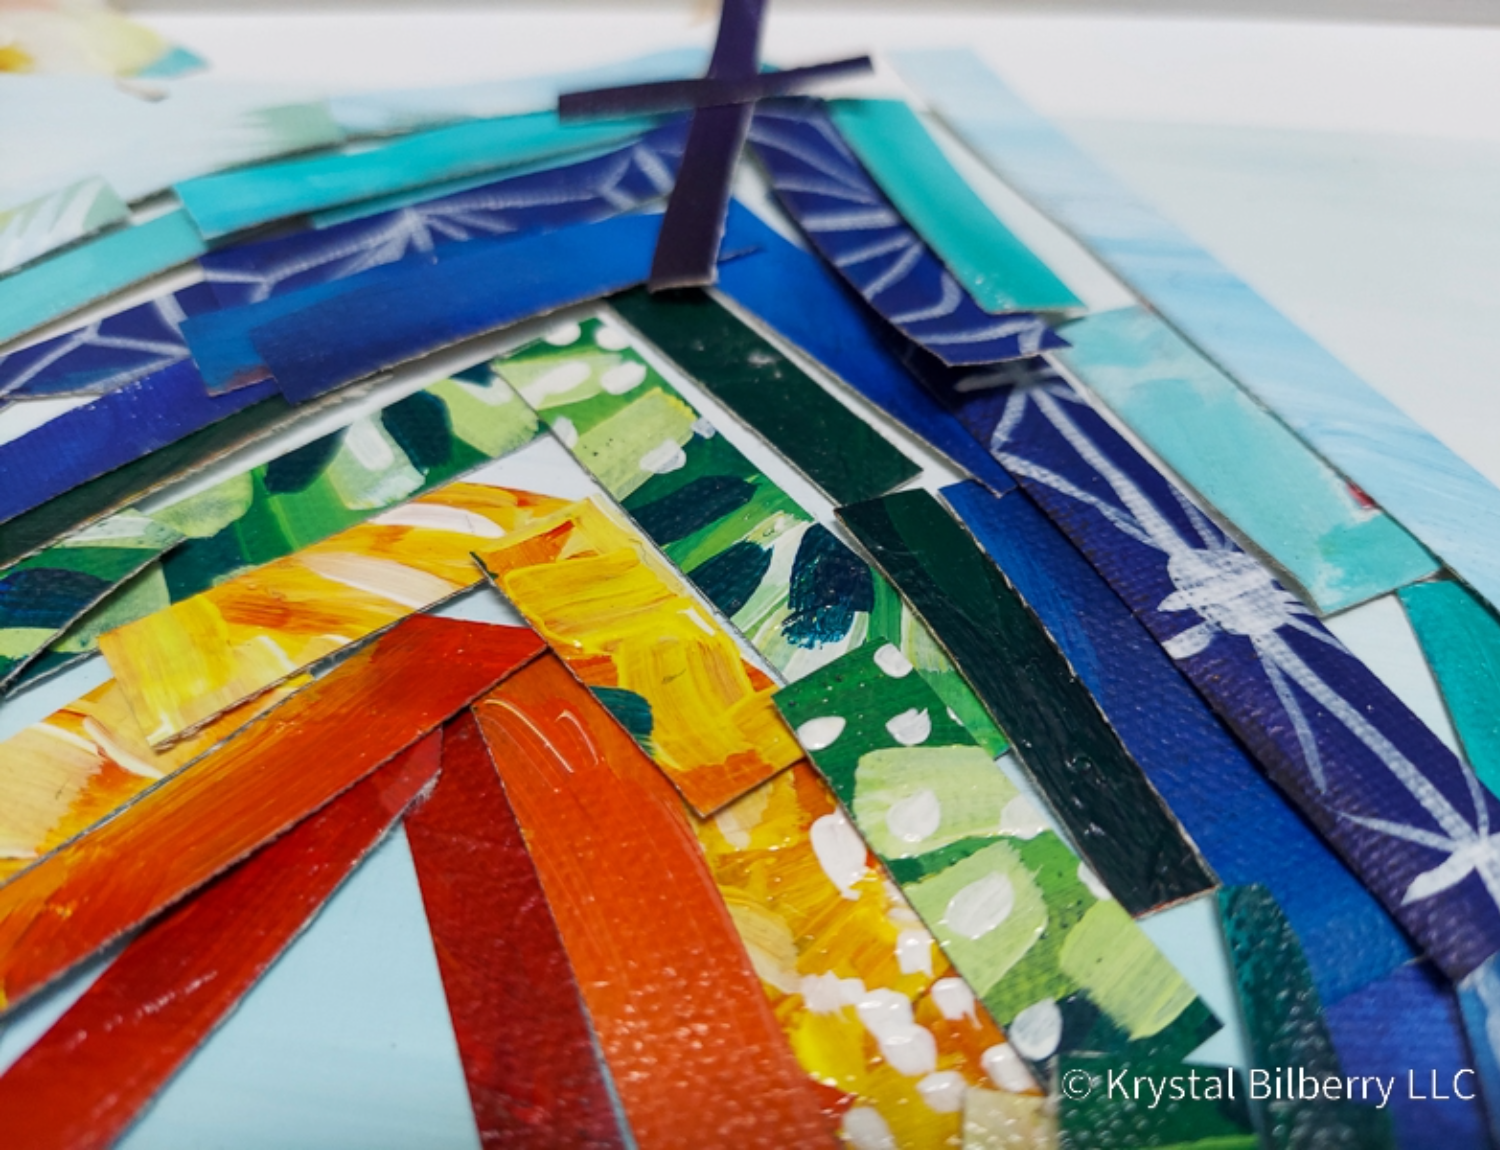
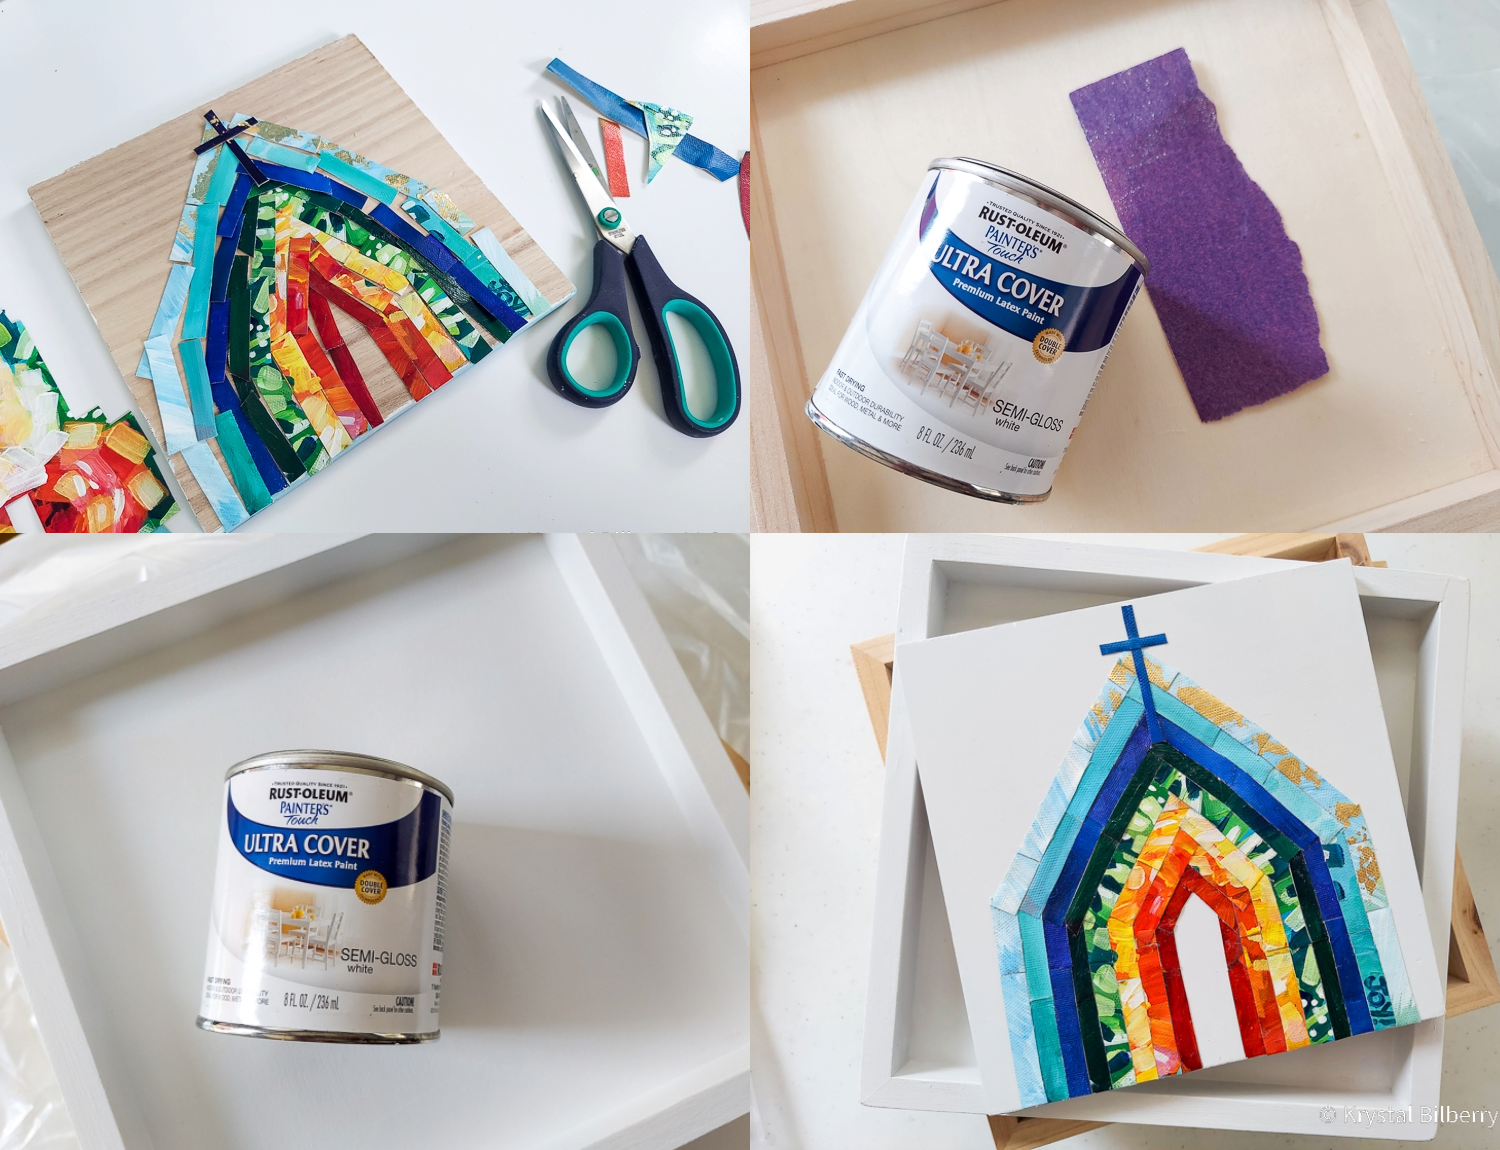
Survey your painted canvas and decide which pieces you want to keep. Whether you have a plan or not, start cutting out the parts you love. In my case, I was gearing up to create another series of rainbow chapels, a fan favorite. But hey, just cut out what speaks to you – there are no rules! Embrace the freedom and play of cutting up your art to make new joy!


I store my extra clippings in a clear tackle box. This collage needed pieces from other paintings to make the full rainbow.
Step 3: Arrange Your Composition on a Firm Board
I usually play around with arranging my cut pieces on a canvas board, sturdy cardboard, or a wood panel. This gives me the flexibility to experiment with shapes without committing to a final surface just yet. But hey, if you want to prep the surface ahead of time, go for it.

Step 4: Prepare Your Wood Panel
Canvas pieces adhere best to wood panels or cradled wood. In my example, I'm using repurposed wood from Tae Kwon Do boards. Sand the wood, wipe off the dust, and let it dry. You can use wood primer, gesso, or go simple with acrylic paint. I prefer gesso and Rustoleum Ultra Cover Semi-Gloss paint – a double layer for that extra oomph.
Step 5: Grab the Glue and Let's Do This!
Time to glue it all together! I swear by Golden Soft Gel Matte Acrylic Medium (heavy works too). Put a dollop in a container to prevent the whole jar from drying out. Use a paintbrush to generously apply the gel medium to the back of the canvas pieces. Be generous – we want that canvas sticking! If your canvas is on the thicker side, pop a weight on it for 10-15 minutes to prevent curling.

I use Golden Soft Gel Matte Acrylic Medium as the “glue”
Step 6: Finishing Touches
After finishing the collage, use wood glue to attach your wood board to the back of a cradled wood panel for an elevated look. I even use foam core strips to keep everything centered. Stack some heavy books on top and let the wood glue work its magic. After a few hours – voila! Your past art has a fresh, vibrant life.
For a nice finishing touch, I recommend using acrylic varnish to seal the painting (or go big with clear resin).

Thanks for creating with me today!
This is my first tutorial post, so drop your questions in the comments if you have any. Get ready to experience the joy of transforming your art into something new and exciting. Happy crafting!
Check out my available collages here or view the different types I’ve made before here.
-Krystal
Materials Needed:
One or more underloved paintings on stretched canvas
Scissors
Exacto blade
Gel Medium
Paint Brush
Paper weights with flat bottom
Flat head screwdriver
Needle nose pliers (optional)
Cradled wood panel
Wood board (optional)
Acid-free plastic or trash bag
Heavy books
½ inch x 4 inch foam core strips (optional)
Wood glue
Gesso or Primer (optional)
Rust-o-leum paint
Varnish